前言
Sentinel 原生版本的规则管理通过API 将规则推送至客户端并直接更新到内存中,并不能直接用于生产环境。不过官方也提供了一种 Push模式,扩展读数据源ReadableDataSource,规则中心统一推送,客户端通过注册监听器的方式时刻监听变化,比如使用 Nacos、Zookeeper 等配置中心。这种方式有更好的实时性和一致性保证。这里我们通过配置 Nacos 来实现流控规则的统一存储配置。
架构
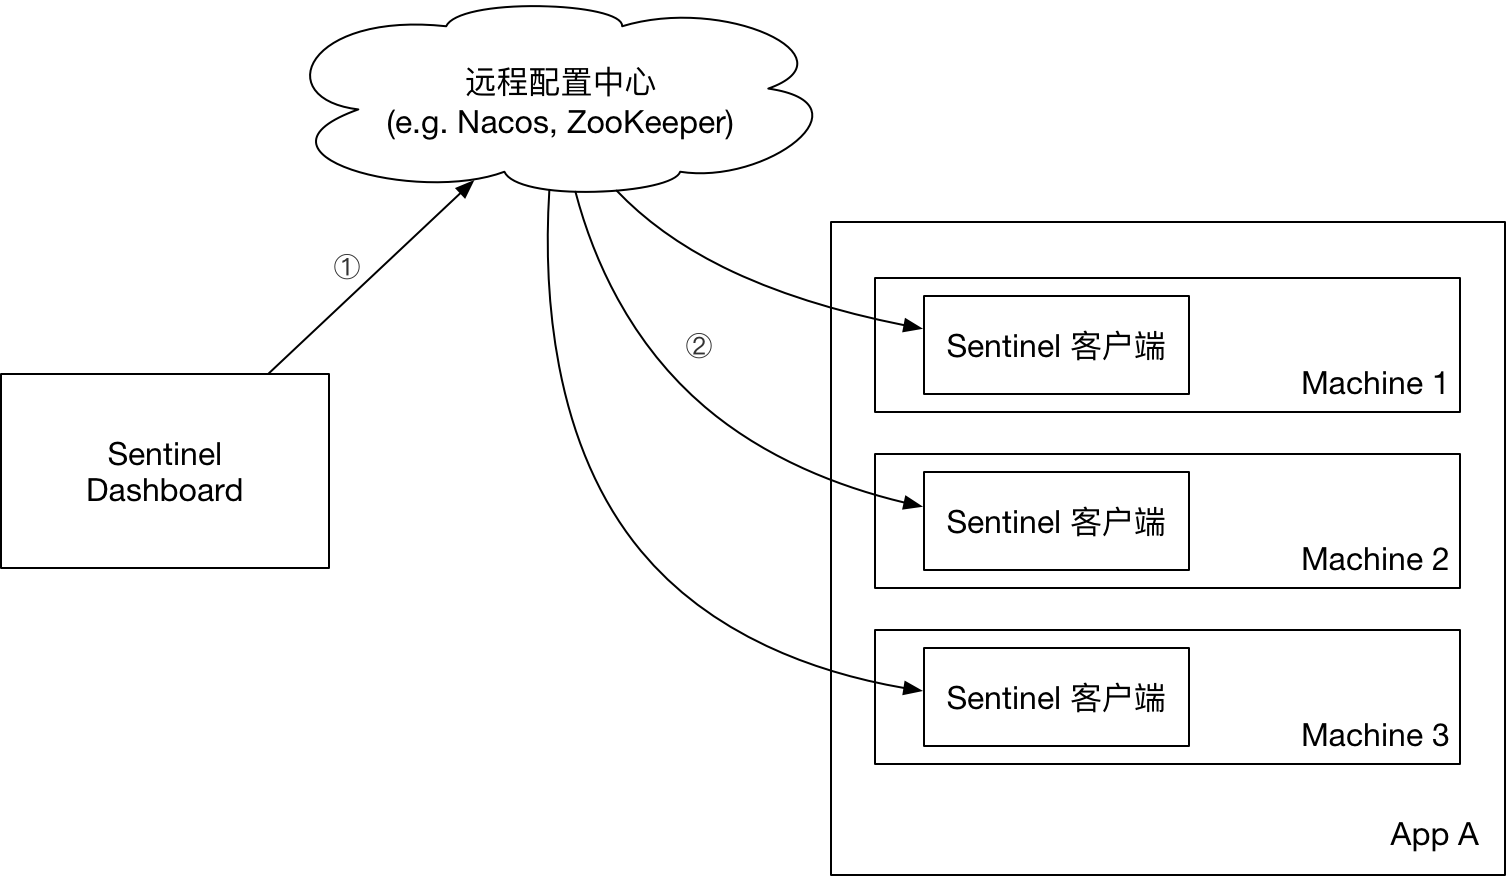
控制台推送规则至配置中心,客户端通过监听事件从配置中心获取流控规则。
客户端配置
pom.xml 引入:
<dependency>
      <groupId>com.alibaba.csp</groupId>
      <artifactId>sentinel-datasource-nacos</artifactId>
      <version>1.6.3</version>
 </dependency>
配置文件:
# nacos的访问地址,配置参考 https://blog.52itstyle.vip/archives/4174/
spring.cloud.sentinel.datasource.ds.nacos.server-addr=47.104.187.19:8848
#nacos中存储规则的dataId,对于dataId使用了${spring.application.name}变量,这样可以根据应用名来区分不同的规则配置
spring.cloud.sentinel.datasource.ds.nacos.dataId=${spring.application.name}-flow-rules
#nacos中存储规则的groupId
spring.cloud.sentinel.datasource.ds.nacos.groupId=SENTINEL_GROUP
#定义存储的规则类型
spring.cloud.sentinel.datasource.ds.nacos.rule-type=flow
控制台配置
修改 pom.xml,原来的<scope>test</scope>去掉:
<dependency>
      <groupId>com.alibaba.csp</groupId>
      <artifactId>sentinel-datasource-nacos</artifactId>
</dependency>
把 src/test 下面的包 com.alibaba.csp.sentinel.dashboard.rule.nacos 拷贝到 src/main/java 下面。
修改 NacosConfig:
/**
 * @author Eric Zhao
 * @since 1.4.0
 */
@Configuration
public class NacosConfig {

    @Value("${nacos.address}")
    private String address;

    @Bean
    public Converter<List<FlowRuleEntity>, String> flowRuleEntityEncoder() {
        return JSON::toJSONString;
    }

    @Bean
    public Converter<String, List<FlowRuleEntity>> flowRuleEntityDecoder() {
        return s -> JSON.parseArray(s, FlowRuleEntity.class);
    }

    @Bean
    public ConfigService nacosConfigService() throws Exception {
        Properties properties = new Properties();
        properties.put("serverAddr",address);
        return ConfigFactory.createConfigService(properties);
    }
}
application.properties 配置引入 Nacos:
# nacos的访问地址,配置参考 https://blog.52itstyle.vip/archives/4174/
nacos.address=47.104.197.19:8848
FlowControllerV2 指定对应的 Bean 开启 Nacos 适配。
@Autowired
@Qualifier("flowRuleNacosProvider")
private DynamicRuleProvider<List<FlowRuleEntity>> ruleProvider;
@Autowired
@Qualifier("flowRuleNacosPublisher")
private DynamicRulePublisher<List<FlowRuleEntity>> rulePublisher;修改sidebar.html页面, 流控规则路由从 dashboard.flowV1 改成 dashboard.flow
<-- nacos 动态规则配置-->
<li ui-sref-active="active" ng-if="!entry.isGateway">
<a ui-sref="dashboard.flow({app: entry.app})">
<i class="glyphicon glyphicon-filter"></i> 流控规则</a>
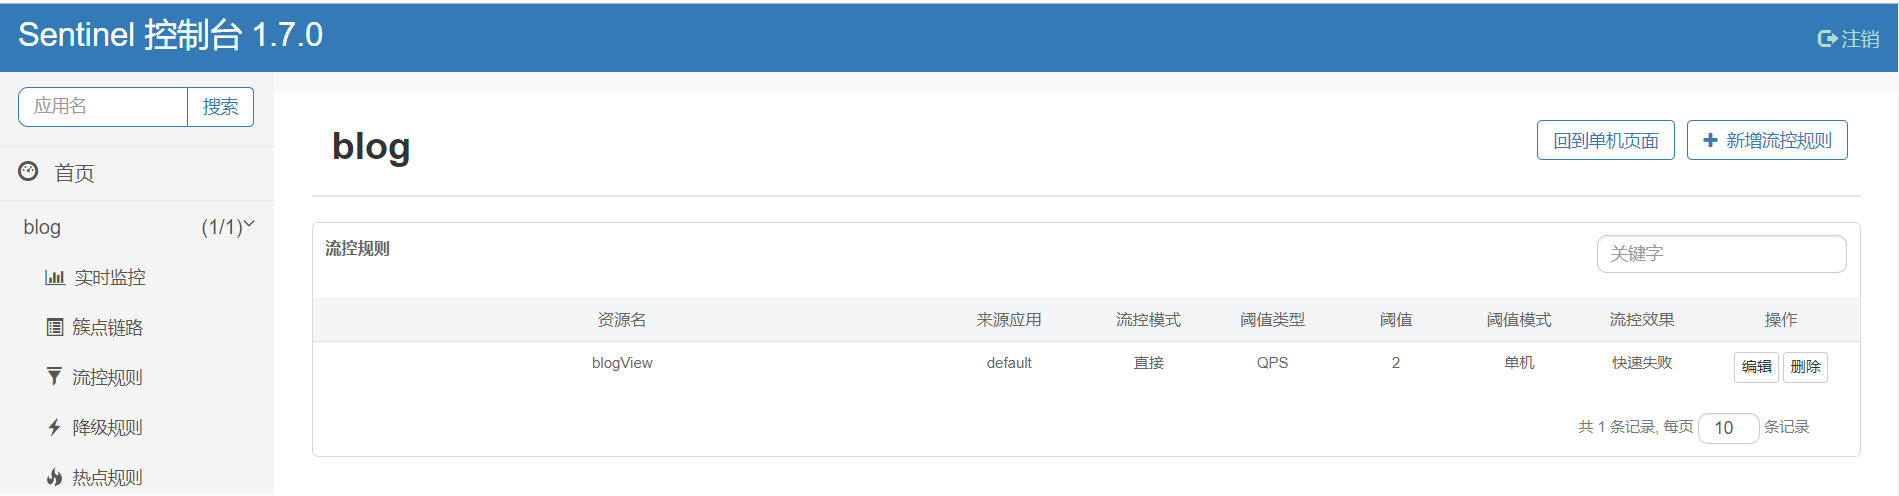
</li>如图所示,界面会多了一个回到单机页面的按钮,这里我们新增一个流控规则。
登录 Nacos 后台,配置管理->配置列表:
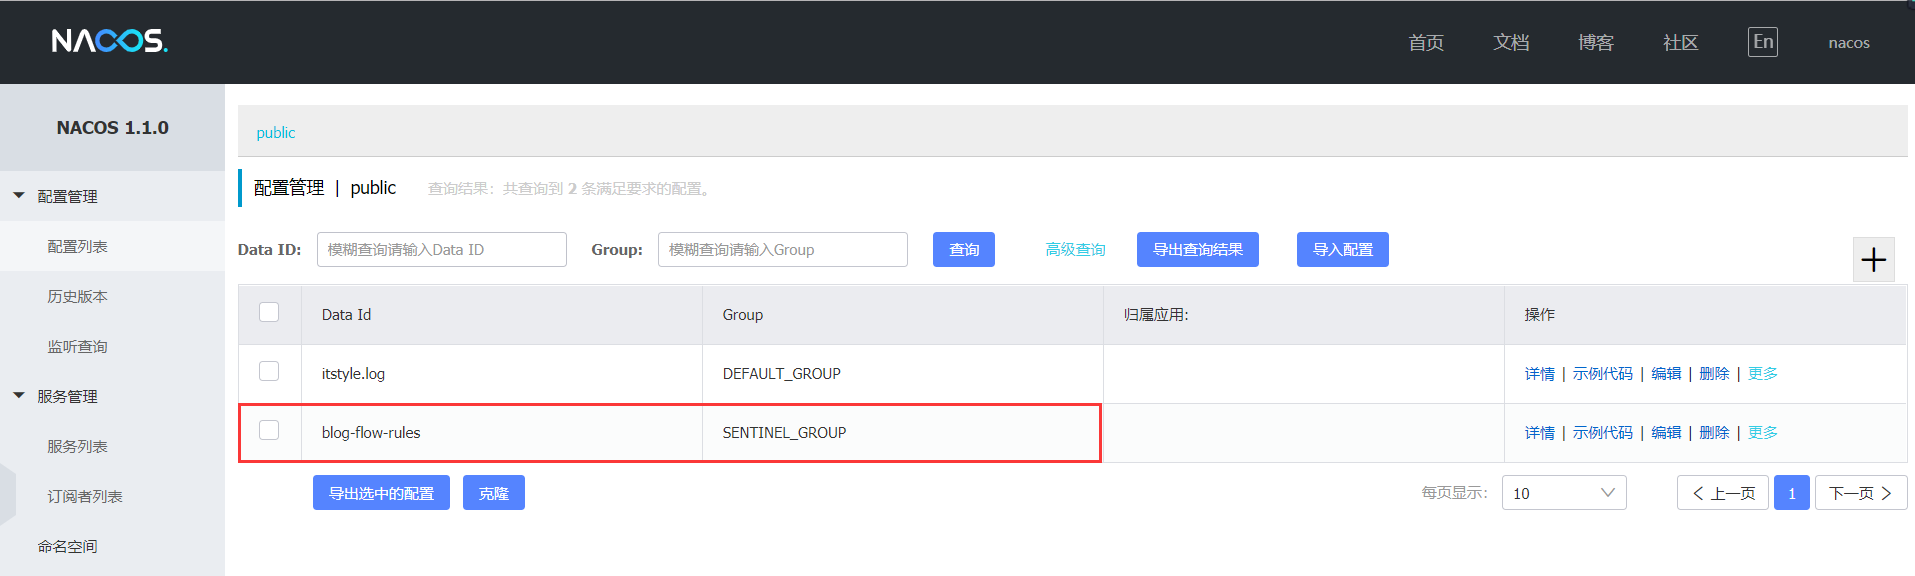
点击进入配置详情,配置内容如下:
[{
    "app": "blog",
    "clusterConfig": {
        "fallbackToLocalWhenFail": true,
        "sampleCount": 10,
        "strategy": 0,
        "thresholdType": 0,
        "windowIntervalMs": 1000
    },
    "clusterMode": false,
    "controlBehavior": 0,
    "count": 2.0,
    "gmtCreate": 1568617671812,
    "gmtModified": 1568622253889,
    "grade": 1,
    "id": 6,
    "ip": "10.136.168.88",
    "limitApp": "default",
    "port": 8720,
    "resource": "blogView",
    "strategy": 0
}]
小结
生产环境下,推送规则正确做法应该是 配置中心控制台/Sentinel 控制台 → 配置中心 → Sentinel 数据源 → Sentinel。
案例
https://gitee.com/52itstyle/spring-boot-blog
参考
https://github.com/alibaba/Sentinel
https://github.com/alibaba/Sentinel/tree/master/sentinel-dashboard